Installing & Configuring VPN Client
Introduction
This guide is intended for home users that are using their own hardware. Follow the steps of this guide to install & configure your VPN access, then head over to this guide for steps on accessing shared documents.

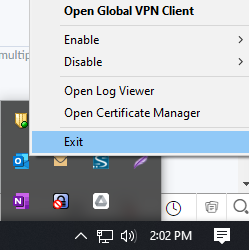
Note: When you close the VPN application, it actually minimizes to your system tray, which is in the bottom right, by the clock. Some users have reported network slowdowns that have been resolved by right clicking & closing the VPN application. So when you're not using the VPN, verify that the application has completely closed by right click closing it from the system tray as pictured.
Downloading The Application
First we need to download the application. To do so, head to this link, scroll to the bottom to where it says "Global VPN Client (GVC)" & select GVC (64-Bit) from the dropdown, as pictured, then click Download.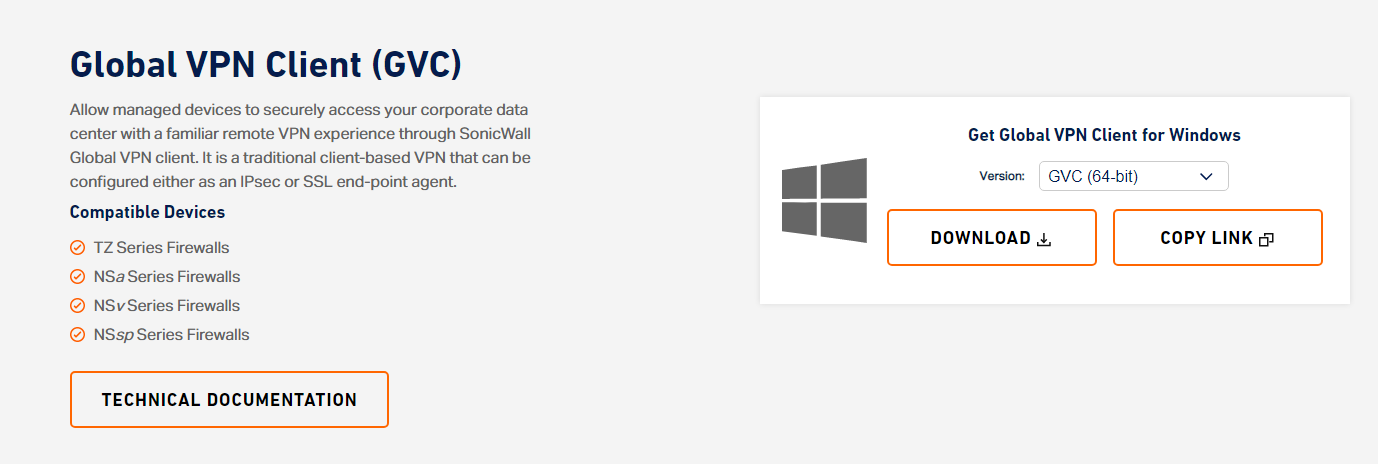
Installing The Application
Head over to your Downloads folder & locate the latest downloaded file, which ends in GVCSetup64. The characters before this change depending on the version number. In our example, we have a file called 184-010739-00_REV_A_GVCSetup64. The numbers will be different depending on when you follow this guide.
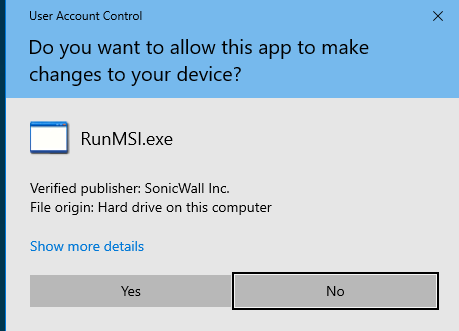
Step 1) Double click the downloaded file, and select Yes when prompted to run.
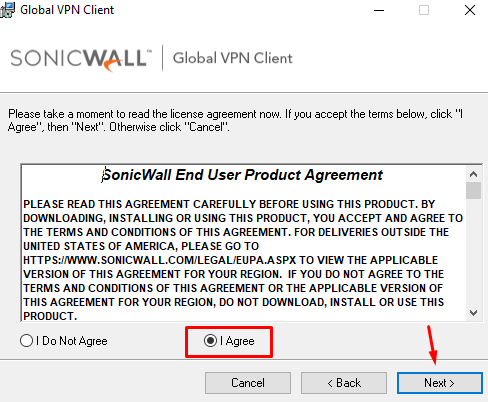
Step 2) Select Next, Agree to licenses, and Next through the rest of the install. Everything can be left default.
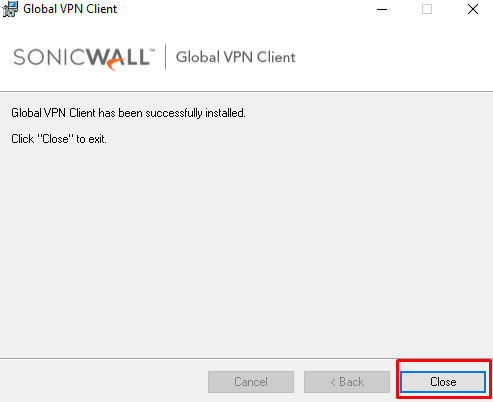
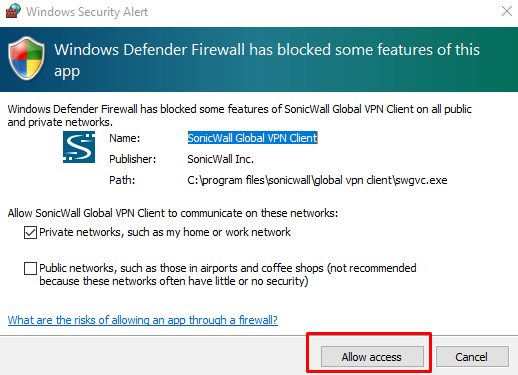
Step 3) Once the installer is complete, click Close. Afterward you may be prompted with a firewall exception, go ahead & allow access. That's it, the Sonicwall VPN Client is installed.
Configuring The VPN Application
Once the application is installed, all we have left to do is configure it to connect to YPC Media's network. From there, navigate to this guide to connect to shared folders.
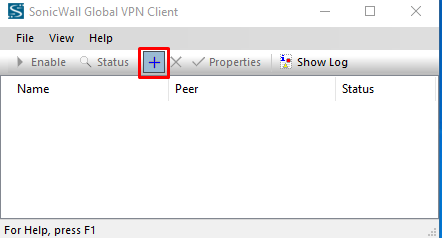
Step 1) Press the + button on the sonicwall application, as pictured. This will bring up the new connection wizard.
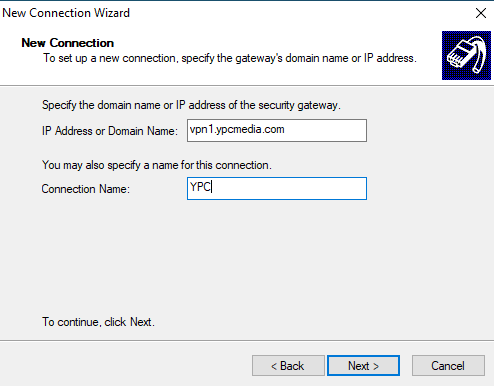
Step 2) On the new connection wizard, click next, and enter the IP Address & Connection Name. Then, click Next.
IP Address: vpn1.ypcmedia.com
Connection Name: YPC
IP Address: vpn1.ypcmedia.com
Connection Name: YPC
Step 3) That's actually it, the connection has been set up. To test, click enable, and enter the pre-shared key of y3ll0w585 - which you'll only be prompted for once, then enter your username & password that you log into your YPC PC & email with (without the @ypcmedia.com). Continue to the Using VPN to access Shared & Personal Files for information on accessing files.
Related Articles
Using VPN to access Shared & Personal Files
Introduction A VPN, or Virtual Private Network, is a tool that allows you to connect into a network that you aren't physically in front of. At YPC, we use this to access internal tools & documents. This guide will go over how to use your VPN to ...